


Recycling exercise with the
OrnaMental Maps technique
OrnaMental maps is a method to create half-consciously drawn geometric ornament on recycles objects based on a collection of ornaments.
If you or your organisation have tried out or applied this creative exercices within a workshop, please share your experience with us. You can also upload images and put link to your website or social media.
Why to work with ornaments ?
Ornaments have dozens of different uses, functions and meanings broadcasting universal and very specific messages at the same time. Their main characteristics that make them apt to reuse and recycle :
-
they are free from ideology still they are closely connected to ethnic, religious or cultural identities
-
they can be adapted to many different material and digital artistic medias
-
there are easy and simple methods to create them even without having special artistic skills
-
creating them has a therapeutic aspect and a calming effect.
-
They are everywhere and it's possible to approach many different topics through them.
Ornaments are everywhere! Think about what they look like, how could things be turned into 2 dimensional geometric ornaments.
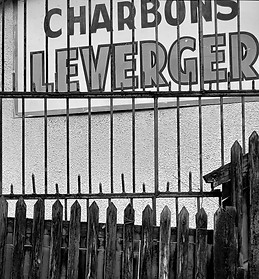
Step 1 :
Take a walk outside in your own neighborhood and make some photos about anything that can be transformed into geometric ornament, such as drainers, fence, pavement, even wheels :


Step 2 :
Now look around at home. Pick up some objects such a piece of cloth, a book or anything else containing or representing geometrical ornaments. It can be an object with a personal story, which is important for you for some reason or something linked to your culture of origin. Such as this pillow with Hungarian folk patterns or this scarf embroidered by Syrian ladies. Take some photos about these too.


Step 3 :
Pick up a piece of furniture, a wooden board or any smaller object that you don't use anymore. You may use anything that you find it in the street, thrown away by your neighbors or at home, it the cave : any tired or shabby piece.
If you work in group and you make the exercise in a group, the best choice is an unvarnished wooden board measuring at least 30 x 40 cm so that 3 or 4 may sit around it comfortably when you begin the work. If you are more then 4, try to find a larger board or use more than one : 1 board per 3 or 4 persons.
Step 4 :
Prepare the tools that you'll need :
- pencils (as many as you are)
- erasers
- acrylic paint
- plastic containers (such as smaller recycled bottle tops to mix the paint and bigger ones for water
- brushes
- eventually rules and compasses
- varnish (if you want to finalize your object and use it afterwords)
Step 5:
Form groups of 3 or 4 persons and sit around a board.
Step 6:
Each of you shall prepare photos (at least two of them). You can also print them to have them before your eyes or just observe them for a while and retain the basic line of your ornaments.
Step 7:
Choose a topic to talk about while you'll be drawing. It can be about your visual experiences in your neighborhood or in the locality where you're originally from. You can also compare them. Try to give a visual description about things that you like there and those that you don't. You can do it in turn, one at a time
Step 8:
In parallel, each of you will begin to draw with a pencil at different points of the board. Use the ornaments on your photos as a starting point for your drawing that you'll continue to develop in a half conscious way while you are either talking or listening to the others.
OrnaMental maps is a technique based on a half conscious way of creating patterns. The aim is to liberate you from the stress of wanting to create something beautiful and well-done but also to help you to get to know each other by sharing stories. To reach these two goals at the same time, you will use the technique of divided attention.
While you talk or you listen to the others, the visual descriptions might also influence the patterns you draw.
Step 9:
As the patterns you draw each of you independently expands on the surface of thee board, at one point, they will get close to each other. At that moment, you will have to find solutions together how to link them to each other. You have several solutions, you will find some examples below.
Linking the patterns is a symbolic gesture: you need to think about how to unite different universes, how to create connections.


Step 10:

Step 10:
Add your colors. Colors may introduce additional rhythms to your patterns, "brake" them or vary them. But color may also be the key for a harmonious appearance of all the different geometric patterns. For example, you can decide to use the different shades of only one or two colors such as the red on this example of an OrnaMental map.

Different ways to create transitions between your geometrical ornaments:
Delimitation of patterns by adding stripes

Overlapped patterns
Use of an imaginary grid into which you can fit different forms

Linking elements with lines or by adding simple forms between them

Leaving empty spaces
If you work with more then one group at once, so on several objects, you can also create connections between there separate objects, for example by using the same range of colors on each.


